Push to GitLab
Overview
Sau khi test thành công, bạn sẽ push code lên GitLab để version control và chuẩn bị cho CI/CD.
Step 1: Initialize Git Repository
1. Check Git Status
# Navigate to project root
cd /path/to/everyonecook-dev

# Check if Git is already initialized
git status

# If not initialized:
git init
2. Configure Git
# Set your name and email
git config user.name "Your Name"
git config user.email "your.email@example.com"

# Verify configuration
git config --list
Step 2: Create .gitignore
1. Create .gitignore File
# Create .gitignore
cat > .gitignore << 'EOF'
# Dependencies
node_modules/
package-lock.json
yarn.lock

# Build outputs
dist/
build/
*.js.map
*.d.ts.map
cdk.out/
.next/

# Environment variables
.env
.env.local
.env.*.local

# AWS
*.pem
*.key
cloudfront-private-key.pem

# Deployment packages
*.zip
deployment/

# Logs
logs/
*.log
npm-debug.log*
yarn-debug.log*
yarn-error.log*

# IDE
.vscode/
.idea/
*.swp
*.swo
*~

# OS
.DS_Store
Thumbs.db

# Test coverage
coverage/
.nyc_output/

# Temporary files
tmp/
temp/
*.tmp

# CDK
cdk.context.json
outputs.json

# TypeScript
*.tsbuildinfo
EOF
Step 3: Stage and Commit Files
1. Add Files to Staging
# Add all files
git add .

# Check what will be committed
git status
2. Create Initial Commit
# Commit with message
git commit -m "Initial commit: EveryoneCook infrastructure and backend"

# Verify commit
git log --oneline
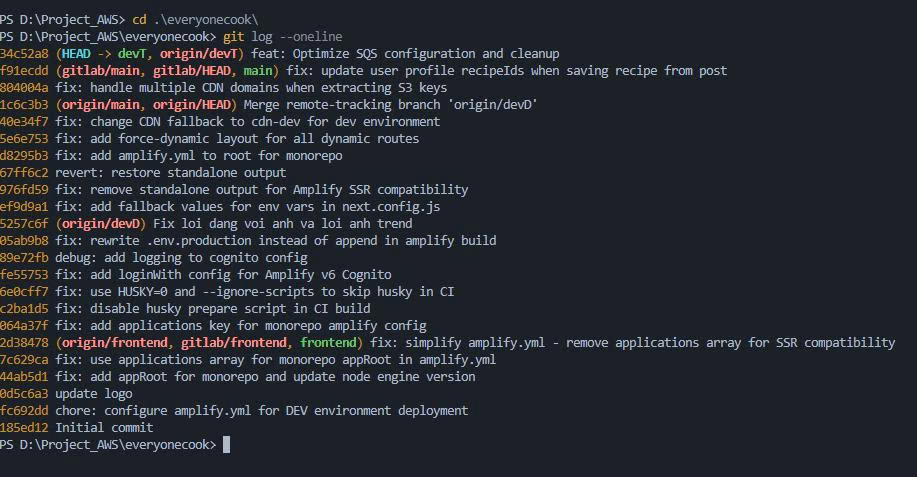 Screenshot: Terminal showing initial commit
Step 4: Create GitLab Repository
1. Login to GitLab
Go to https://gitlab.com/ and login
2. Create New Project
- Click “New project”
- Choose “Create blank project”
- Project name:
everyonecook - Visibility: Private (recommended)
- Initialize with README: No (we already have code)
- Click “Create project”
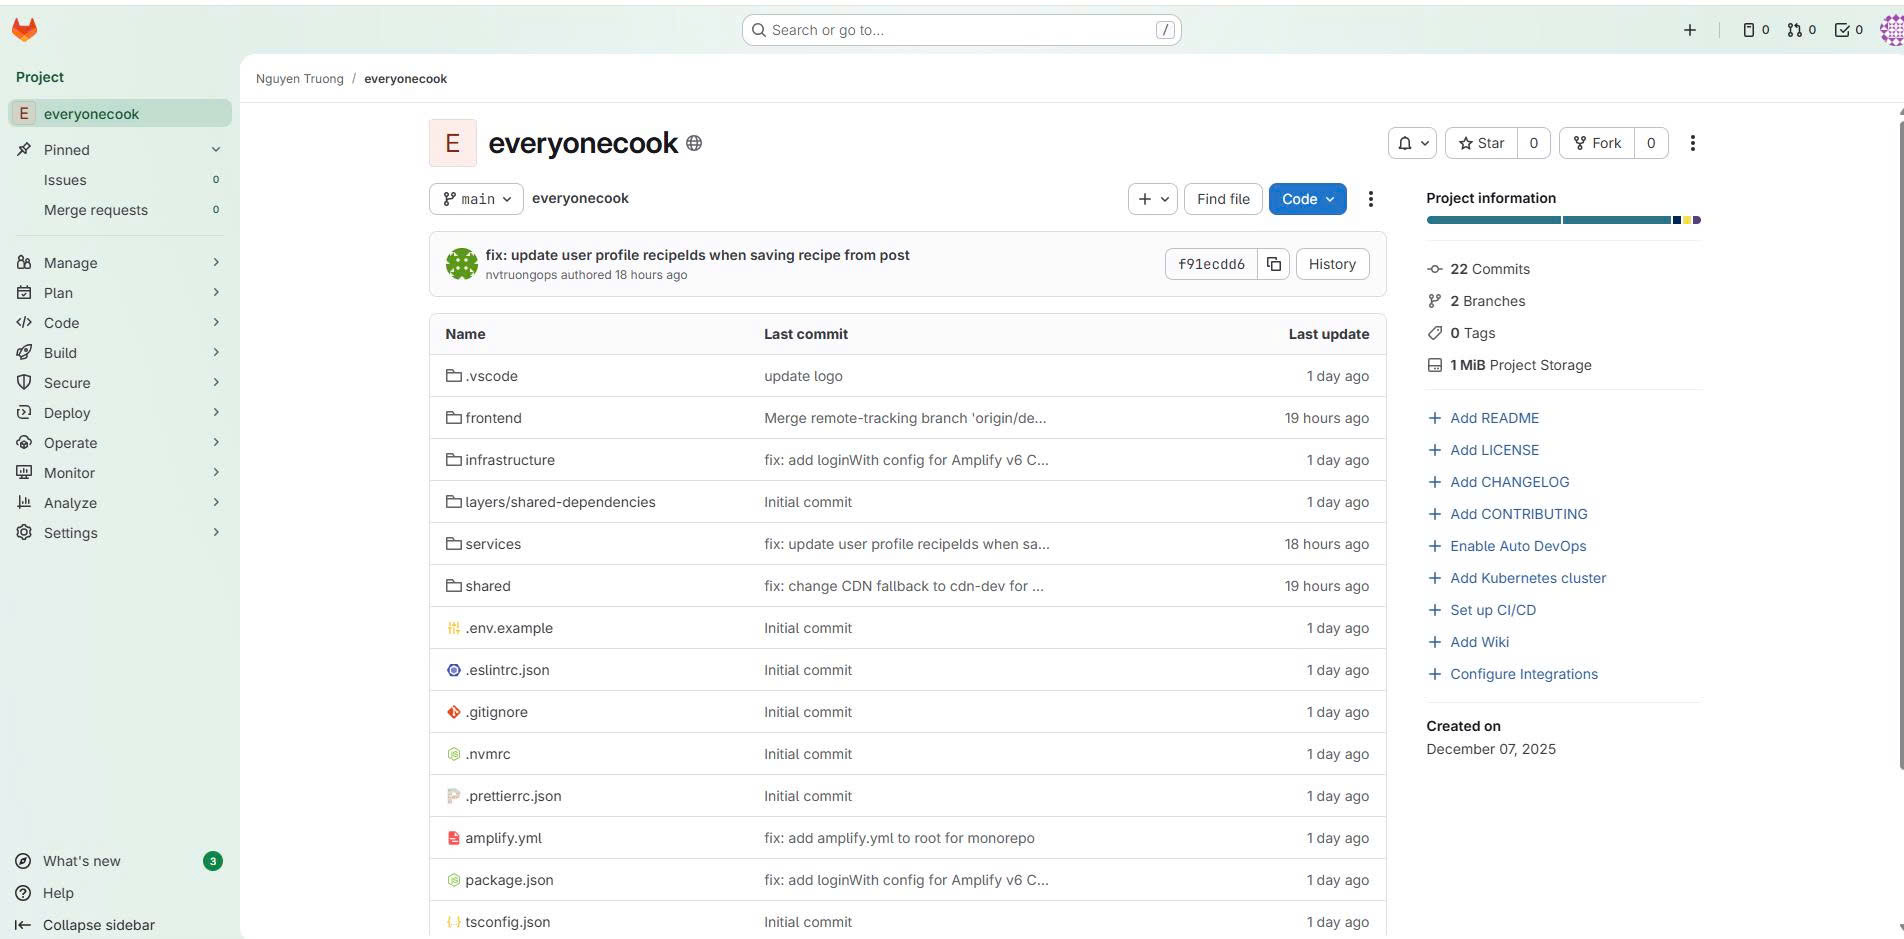 Screenshot: GitLab showing new project created
Git Workflow Summary
1. Create feature branch from dev
   git checkout -b feature/new-feature

2. Make changes and commit
   git add .
   git commit -m "Description"

3. Push to GitLab
   git push -u origin feature/new-feature

4. Create merge request on GitLab
   feature/new-feature → dev

5. Review, test, and merge

6. Deploy to dev environment
   (manual trigger in GitLab CI/CD)

7. Test in dev environment

8. Merge dev → main for production

9. Deploy to production
   (manual trigger in GitLab CI/CD)

10. Tag release
    git tag -a v1.0.0 -m "Release"
Best Practices
Commit Messages:
feat: Add user authentication
fix: Fix login bug
docs: Update README
style: Format code
refactor: Refactor user service
test: Add unit tests
chore: Update dependencies
Branch Naming:
feature/add-notifications
bugfix/fix-login-error
hotfix/critical-security-patch
release/v1.0.0
Troubleshooting
Issue: Authentication failed
# Use personal access token instead of password
# Generate token: GitLab → Settings → Access Tokens
# Use token as password when pushing
Issue: Large files rejected
# Check file size
git ls-files -z | xargs -0 du -h | sort -h

# Remove large files from history
git filter-branch --tree-filter 'rm -f large-file.zip' HEAD
Issue: Merge conflicts
# Update your branch
git checkout feature/your-feature
git fetch origin
git merge origin/dev

# Resolve conflicts in files
# Then commit
git add .
git commit -m "Resolve merge conflicts"
git push
Next Steps
Once code is pushed to GitLab, proceed to Deploy to Amplify to deploy your frontend application.